
-1200x533.jpg)
We often talk about how cycling can be a great substitute for short-medium trips by car, but there are plenty of people who are happy to clock up the kilometres on longer journeys by bike (especially with some of the fantastic new cycleways around the city to explore). That’s probably even more the case now that e-bikes are rising in popularity – suddenly 10-20km doesn’t seem like a big deal when you’re getting a bit of pedal assist. Even if you’re still limited to getting around completely under your own steam, this post (originally from Jan 2014) can give you a bit of advice on how to manage longer distances without too much drama…
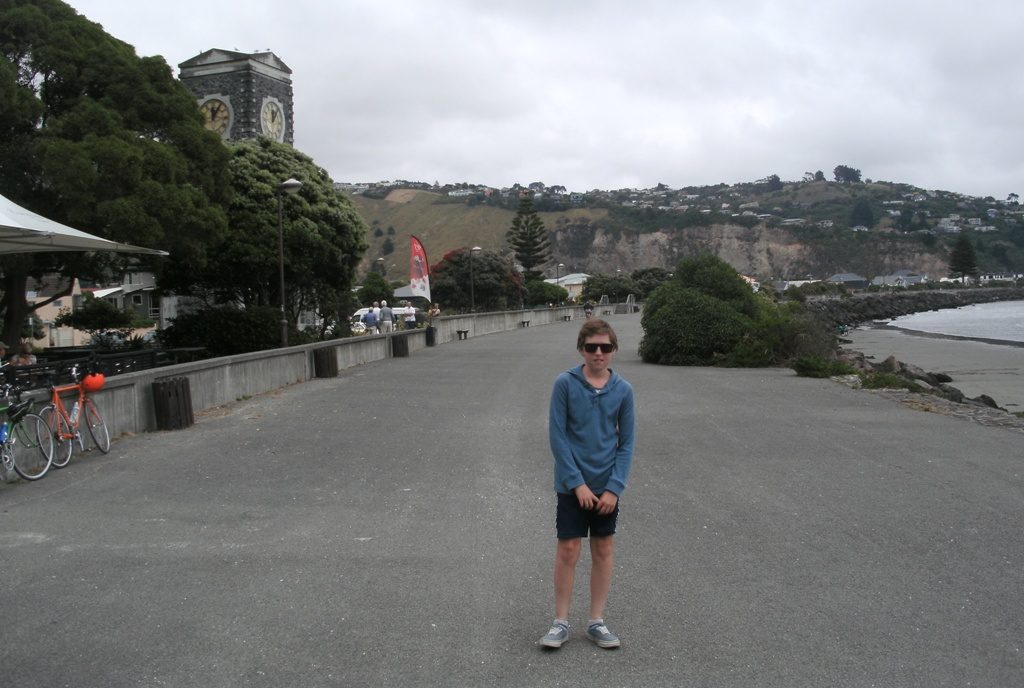
When I told you the other week about the ride that my son and I took out to Sumner, I mentioned that we clocked up 30km on the trip. For some people relatively new to cycling, that might seem like a very long distance to ride. But, as I’ll explain, with good preparation you will find that you can surprise yourself about just how far you can go on your bike.
The first question might be: what constitutes a “long distance”? Simply speaking, it depends. If you’re very new to riding, anything more than about 5km (or 15-20 minutes riding) might seem a lot. If you regularly get on your road bike and go for a training ride, then maybe 80-100km would seem long. Over time you will probably find that your range increases as your general fitness and stamina does. But many of the same principles here will apply, no matter what your personal limit is.
Here are a few handy hints:
- Initially you will probably underestimate just how far you actually can ride on your bike in a relatively short time; it is such an efficient machine. The average rider can easily travel at 15-20km/h at a leisurely pace (and many go a lot faster) so, even with regular stops and delays, you can cover a good distance over (say) a couple of hours. My boy was hoping that we might do 20-25km on our ride, so he was really chuffed when we ticked over 30km just before getting home. Nevertheless, if you’re not sure about your range, start small, e.g. perhaps just 20-30 minutes of riding to begin with.
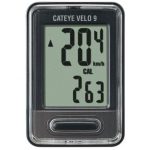
- A good investment is a simple bike computer to show you how far you’ve travelled (or these days, there’s a whole range of smartphone GPS apps that will do something similar). The fancier ones can also give you a whole heap of other stats about your bike speeds, pedalling rates (cadence), heartbeat, and so on. There’s nothing like a bit of live feedback to provide some motivation; it’s encouraging to realise how far you’ve already come, as well as the incentive to go that little bit further. As we rode out to Sumner, my boy kept wanting to know how far we’d gone; as I rattled off the distances I think he was pleasantly surprised at how quickly the kilometres were adding up.
- If you bike far enough, you will probably find that ordinary riding clothes start to get uncomfortable. My daily commute to work for example is about 9km and that is starting to get to the limit of what is a pleasant ride in ordinary trousers or shorts. While many people are scathing of padded lycra, there is a very good reason to wear it! If you bike far enough you will appreciate both the cushioning and the minimisation of chafing. And if you’re a bit self-conscious about some stretchy lycra, there’s no rule that says you can’t wear it underneath your other clothes (or buy some stylish padded shorts instead). My boy didn’t have any padding on our ride to Sumner and he was feeling it a bit by the time we were finished (might be higher on his wishlist now). One trick that he did was to regularly stand on his pedals while riding, to take the pressure off his backside.
{By the way: you’ll probably find also that, over time, you naturally get more used to riding longer distances even without padding. So don’t fret if your first ever 5km ride is a bit uncomfortable; it can only get better!}
- Make sure that your seat is at a suitable height, otherwise you may find it starts to get very tiring sooner rather than later. Ideally you should have your legs fully extended and straight when the pedals are at the bottom of their cycle. Many people have their seat too low, resulting in the “knees around your elbows” effect when riding. A high enough seat may mean that you’re on your tip-toes when stopped, or get used to hopping off your seat and straddling the frame when you have to stop.
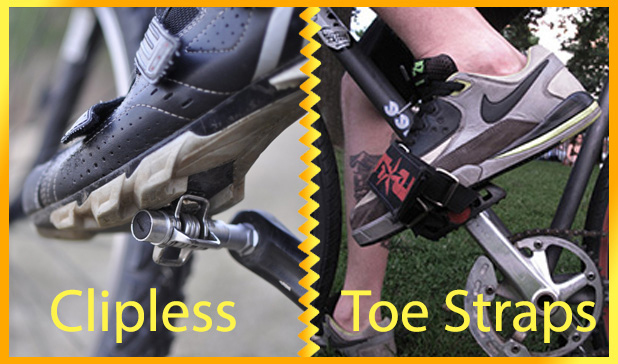
- You may also want to consider pedal toe clips or shoes with click-in cleats if you’re going to do some serious distances. The big advantage is that now your legs also help you pedal when moving up as well as down, thus making your riding more efficient. Personally I’m not a big fan of either (I always find them too fiddly to get in and out of for my liking), but many people swear by them.
- Riding any decent distance will dehydrate you, so make sure that you keep up your fluids. A bottle cage on your bike frame is a good place to get easy access for a drink, or at least make sure you have a decent drink in your basket, bag or pannier and stop regularly to take a swig. If you’re biking around town, then chances are you will be able to find a drinking fountain or cafe to rehydrate yourself. Out of town may take a bit more planning; if you’re not sure how far it is between your refilling stops, take a second bottle to ensure you don’t run out. In our case, we had a drink bottle on each bike and were able to top these up at the Sumner Beach drinking fountain.
- Likewise, keep your energy levels up on long rides with some food. Eat something before you go (not too heavy), and take some nibbles to sustain you along the way (or stop somewhere for a bite to eat). On our ride, we had a couple of energy bars with us to snack on, and we also stopped for a pottle of chips at Sumner as well (well, I don’t know if the latter was the healthiest option we could have chosen, but it felt right…).
- Take your time! Unless you’re doing the actual Tour de France, feel free to ride at a pace that suits you. If it’s a recreational ride, look for opportunities to stop and take a break every now and then; you can stretch your legs, take a break from pedalling, and perhaps grab a bite to eat. On our ride, we had a look at a few of the Heathcote River interpretation panels along the way, as well as grabbing a bite to eat and wandering along the sand at Sumner Beach.

- Keep an eye on the weather and be prepared in case things change. New Zealand is renowned for “four seasons in one day”, so you don’t want to be badly caught out, especially if you are far away from shelter. Although it was a pleasant day on our Sumner ride, I still had my compact fold-up jacket in my front bag in case things got wet or chilly unexpectedly.
- Don’t forget about the sun! New Zealand’s sunshine can be pretty harsh and, even on a seemingly cloudy day, you can get burnt from a few hours out on your bike. So make sure you have some sunscreen with you, and apply it regularly (handy tip: with all that leaning forward, watch that your exposed lower back doesn’t get overlooked). Although our ride started out fairly cloudy, the sun eventually shone through but we were prepared with lotion on hand.
- Sometimes you can also take advantage of the weather, particularly on a windy day. If you have a choice in where you’re riding, I strongly recommend heading into the wind first. That way, the wind can then help you home later when you’re a bit more tired – quite a nice feeling (here’s hoping Murphy’s Law doesn’t see the wind die down later…). When we went to Sumner we started in the morning before the sea breeze got too strong; by the time we headed back later it was pushing us home. Likewise, if you have a choice of terrain, you may wish to ride uphill first and then cruise downhill later.
Longer distance rides take a little bit of preparation, but the reward can be to access some really interesting destinations around your district. With the summer break upon us, that could be a great opportunity to explore some new places.
What’s your top tip for riding long distances?
I like to break it up by thinking about the next point on the line and less about the ultimate destination.
So when doing the coffee culture tour, it can be as little as 1 kilometre till the next stop, averaging about 6km, or a maximum of ~20 km (Airport to Rolleston) which can be broken up as Airport/Hornby/Templeton/Rolleston, about 6 km per piece.
Or Le Race can be broken into warmup on Colombo, up Dyers Pass, Summit Road, down the bastard, across the flat, round the corner to Little River, up to hilltop, turnoff to Pidgeon Bay, little Akaloa, Le Bons Bay, Okains Bay, Cabstand, and down Long Bays.
That’s 13 segments, averaging 8 km each vs a ~100 km ride, which sounds daunting.
And sometimes I do exactly the opposite. Focus on the destination, and suddenly I’m 10 km down the road. Was thinking about getting to Rangiora once, and without really noticing I was already in Hornby. The roads we ride a lot can be quite “short” when not really focussing on them.