
Over the past few months, my bike has been looking progressively more haggard, with various things not quite working as well as they should. The gears weren’t shifting properly, the brakes were a bit so-so, there was a bit of a squeak in the crank-shaft (bottom bracket), and so on. Then in the past week or so I noticed a little bit of a wobble in the back tyre, but I was too busy to look at it closely. Probably a broken spoke (I had been carrying my laptop home a lot lately). Well actually, by the time I did have a closer look, I found three broken spokes…
That stuffed up my travel plans for that day (trying to park a car anywhere near the university is nigh on impossible these days…), but it was a salient reminder to regularly pay a bit of attention to your trusty treadly. Now you might not be very mechanically minded, but there are plenty of simple things you can check before you need to go running off to your local bike mechanic.
A really simple way to just check the basic health of your bike is to do an “M-check”. It’s a good habit to get into on a regular basis (or before you embark on any longer ride). As well as being the first letter in “Maintenance”, “M” also conveniently maps out the order in which you can check things over on your bike; just start from the front and work your way back.
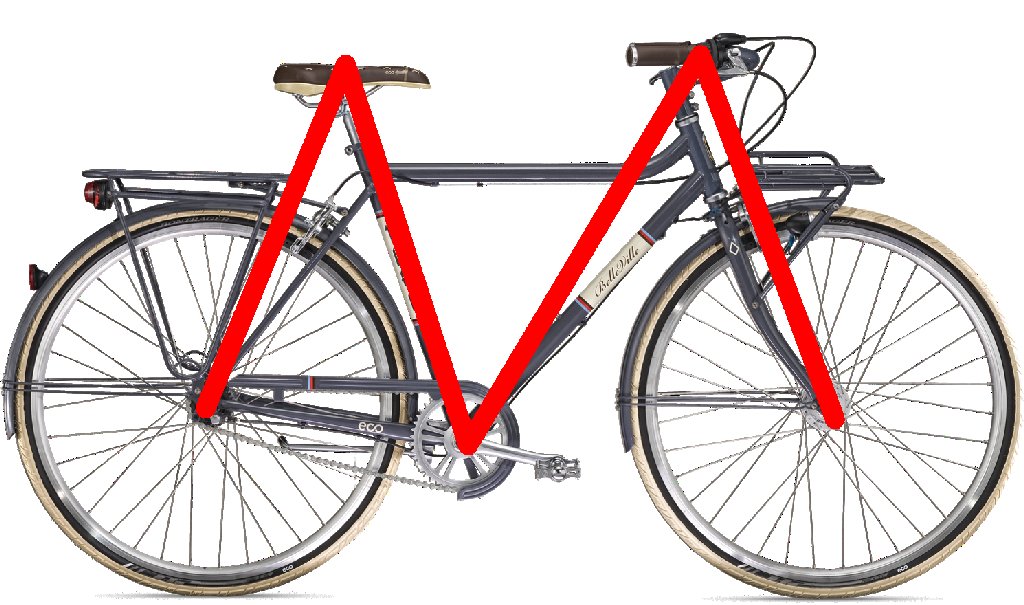
Let’s start at the front:
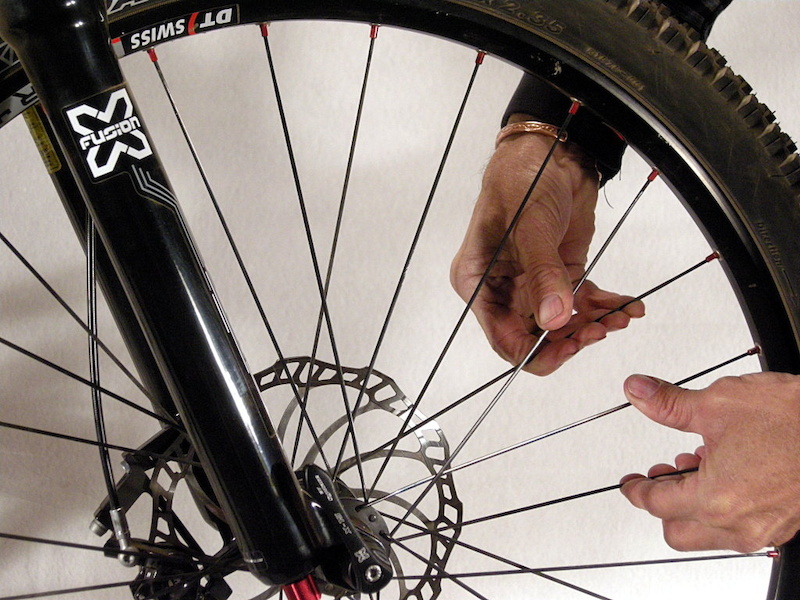
- Is the wheel not wobbling side-on when spun? This is particularly an issue if it’s not correctly attached to the forks (e.g. you have a loosely fitted quick-release) or you have uneven/broken spokes.
- Have a look at the tyre and make sure the pressure is firm – it should be hard to push it in. Far too many people ride on soft tyres with not enough air in them (and your tyre pressure should be higher as your tyres get skinnier). Also check for any splits or embedded objects in the tyre.
- Are the spokes all tightly connected? Grab two adjacent ones between your fingers; they should flex only slightly (alternatively, try to “strum” them like a guitar). If there’s too much “give” you may need to tighten them with a spoke wrench (cheap to buy).
- Are the brake pads (if your bike has them) not overly worn? Are they aligned properly when against the wheel rims (and free when not braking)?
Now onto the handlebars:
- Stand facing the bike with the front wheel firmly between your legs and try to turn the handlebars. They shouldn’t turn if the headset (connecting the stem to the forks) is tightly secured.
- Check the amount of travel with your brake levers – is it easy to strongly apply the brakes? If wheeling the bike briskly along, applying a good back-brake alone will probably skid the bike, while using the front brake will try to over-topple it.
- Likewise, check that the gear levers or twisters are easy to change (remember to pedal the back wheel around to let it change the gears, or make sure that you return to the same original gear)
- If you’re likely to be out at night, check that your front lights are working brightly. Is it time to replace or recharge the batteries?
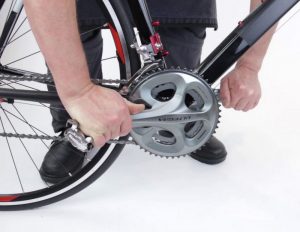
Next, down to the crank area:
- Hold both pedals and try to wiggle them. Ideally there should be no give at all in the bottom bracket (where the pedals go through).
- Check each pedal to make sure that they are still securely attached to the cranks. Some can have a habit of slowly unscrewing themselves.
- Check that the front dérailleur is correctly shifting the chain to the right spot on the gears. There are usually a couple of screws that you can adjust if need be to fix this up.
Back up to the seat:
- Is your seat-post at the right height? Many people have their seats far too low (making pedalling inefficient) and if they’re a loosely fitting quick-release they can also slowly slide down over time. It also shouldn’t be easy at all to wriggle your seat from side to side.
- Is the saddle in good nick? Over time you might get splits in the top or the saddle could crack in its support underneath.
- Make sure that your rear lights are shining brightly if you’re going to be out at night.
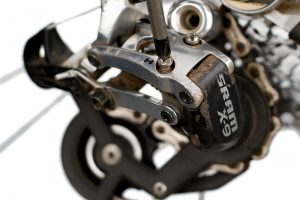
Finally on to the rear wheel:
- Just like the front wheel, check for spokes, wheels, tyres, and brake pads. Note that the back tyre may need a little more tyre pressure because more weight is usually distributed on it.
- Check that the rear dérailleur is correctly shifting the chain to the right spot on all the gears. Again, there are typically a couple of screws for making any adjustments.
If you find some problems with any of the above issues, they might be easy fixes and adjustments that you can do yourself. It can’t hurt to have a book or two in your library on basic bike maintenance, and there are some great websites, handouts and videos around the internet as well. Some of the problems may require some specialist intervention; know your limits. I can usually adjust things like brake pads and gear settings up to a point, but eventually I usually get the mechanic to make sure they’re set up optimally. Fortunately in this case, my local repair shop was able to get my bike back into great shape without parting with too much money. (BTW: for those in the St Martins/Huntsbury area, you’ll be pleased to know that Cycle Surgery has just set up shop right next to New World St Martins)
M is also for “Muck” – and it’s a useful reminder that, when you’re checking over your bike, it’s also a good time to clean up your bike a bit. Just normal riding will add a layer of grime to your bike over time, and that can happen quite quickly if you regularly do some mountain-biking or commute in the rain. A bit of effort with a simple old rag will go a long way to keeping dirt and moisture out of where it shouldn’t be; you might even find a small old toothbrush is useful to get into the crevices. A few weeks ago my chain started “ghost pedalling”, i.e. not free-wheeling or allowing me to pedal backwards. It took a bit of cleaning out the freewheel cassette (inside the rear gears) before it was back to normal.
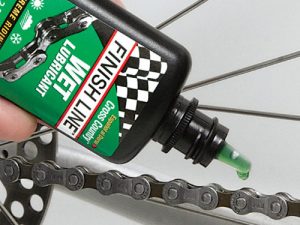
Also ensure that all your moving parts (especially your chain) are well lubricated, to avoid damage and squeaking. Different people will swear by various specialist products; there are hundreds of oils and greases out there (even local Chch products). Just be careful not to use something too heavy like motor oil – you’ll attract grime more easily. You don’t need too much lubrication, but you need something.
What handy bike maintenance hints/tips do you have?
Reblogged this on CycleLike.